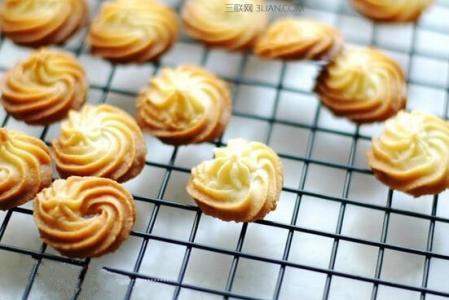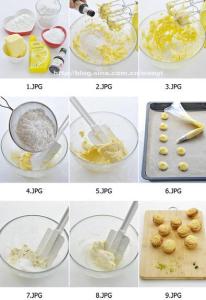
月饼模具做的奥利奥 .lrlrecipedo{clear:both;width:620px;float:left;margin-top:20px;} .lrlrecipedo ul{float:left;} .lrlrecipedo ul li{border: 1px solid #EBEBEB;color: #CCCCCC;float: left;font-size: 14px;height: 40px;line-height: 40px;padding-left: 10px;width: 295px;} .lrlrecipedo ul li .lrlname{float:left;color:#343434;} .lrlrecipedo .lrlfoodlist{clear:both;width:620px;float:left;} .lrlrecipedo .lrlfoodlist ul{float:left;} .lrlrecipedo .lrlfoodlist ul .yli{border: 1px solid #EBEBEB;color: #CCCCCC;float: left;font-size: 14px;height: 40px;line-height: 40px;padding-left: 10px;width: 295px;} .lrlrecipedo .lrlfoodlist ul .wli{border-left: 1px solid #EBEBEB;border-right: 1px solid #EBEBEB;border-bottom: 1px solid #EBEBEB;border-top:0;color: #CCCCCC;float: left;font-size: 14px;height: 40px;line-height: 40px;padding-left: 10px;width: 295px;} .lrlrecipedo .lrlfoodlist ul li .lrlname1{float:right;padding-right:10px;color:#999;}其它菜品口味烘焙主要工艺三刻钟所需时间简单制作难度电烤箱 所用厨具食材明细无盐黄油50克糖粉20克蛋黄10克可可粉6克低筋面粉65克盐1克无盐黄油 50克清水 12克细砂糖 25克全蛋 25克 .lrlrecipestep{float:left;width: 620px;font-size:14px;color:#404040;margin-top:30px;} .lrlrecipestep ul{clear:both;float:left;line-height: 1px;margin: 0;padding: 0;width: 620px;} .lrlrecipestep ul li{clear:both;float:left;line-height: 160px;margin: 0;padding: 0;width: 620px;height:160;padding:25px 0 25px 0;border-bottom:1px solid #ebebeb;} .lrlrecipestep ul li img{float:left;} .lrlrecipestep ul li .lrlstepcon{font-size:14px;float:left;width:430px;height:100px;margin-top:5px;margin-left:10px;line-height:20px; }制作步骤1. 1.黄油室温软化,加盐、糖粉用打蛋器打匀。2. 2.分次加入蛋液,继续搅打均匀。3. 3.加入过筛的低筋面粉、可可粉,混合均匀。4. 4.混合成团后冷藏30分钟。5. 5.取出冷藏好的面团,擀开约4mm厚。6. 6.用饼干模切出形状。7. 7.用月饼模具按压出花纹。(可以直接用模具里面的花片按压,图形会比较清楚)8. 8.剩余的边角料我做成了方形。因为有方形的月饼模具。9. 9.剩余的边角料我做成了方形。因为有方形的月饼模具。10. 10.放入预热180°的烤箱,烘烤约15分钟。11. 11.细砂糖和清水加热至沸腾离火。12. 12.鸡蛋隔热水用打蛋器打发。13. 13.加入煮好的糖水,继续打发。14. 14.分次加入软化的黄油,并继续打发。15. 15.打至如图状态即可。16. 16.装入裱花袋,在裱花袋前段剪口,均匀的挤在一面饼干上。(饼干要放凉后再挤)17. 17.盖上另一片饼干即可。小贴士
配料里需要的原料均是馅料。